Secure Rhinestoning for Training Gear: Hotfix, E6000 and Sew On Crystal Tips

Updated: Sep 5
Loose stones look messy, but the bigger problem is safety. A rhinestone that pops off during practice can scratch skin, snag fabric, or end up under a skate blade, dance shoe, hoof boot, or gymnastics grip. Secure rhinestoning starts long before the first crystal touches fabric.
Training gear asks more from embellishments than a costume worn once under lights. It gets stretched, sweated in, washed, packed, and pulled over base layers. The right attachment method depends on the fabric, the amount of movement, the heat tolerance of the garment, and whether the piece needs to sparkle for daily practice or hold up under arena spotlights.
Hotfix crystals, E6000 glue, and sew-on crystals can all work beautifully. The trick is knowing where each one shines, where each one fails, and how to lay out a design that looks intentional instead of heavy or distracting.

Choose the attachment method that matches the gear
The best rhinestone method is the one that suits the fabric and the job. A warm-up jacket, stretch leggings, leotard, skating dress, riding vest, cheer practice bow, and dance bag all behave differently.
Here is the practical difference between the three main options.
Method | Best for | Watch out for |
Hotfix crystals | Heat-safe fabrics, quick layouts, small to medium stones | Heat can damage some synthetics, coatings, elastic, and delicate mesh |
E6000 glue-on crystals | Mixed fabrics, rhinestuds, shoes, bags, low-heat materials | Needs ventilation, careful placement, and full cure time |
Sew-on crystals | High-stress zones, mesh, cuffs, collars, large stones | Takes longer and needs strong thread and secure knots |
Hotfix stones have heat-activated glue already on the back. They work well when the fabric can handle an applicator or heat press and when the design uses many similar stones. They are popular because placement is fast once the pattern is set.
E6000 is a strong craft adhesive often used for rhinestoning because it grips many surfaces. It is useful when heat is risky or when attaching flatback rhinestones, rhinestuds, or heavier accents. It also works well on accessories that do not stretch much, such as gear bags or helmet covers, if the material accepts glue.
Sew-on crystals have holes or settings that allow them to be stitched down. They are excellent for places that flex, pull, or rub. They also give extra security to statement stones that would be too heavy to trust to glue alone.
For training gear, the strongest results often come from mixing methods. Use hotfix or glue for small scatter stones, then sew down the larger focal crystals. That keeps the sparkle light while anchoring the high-value pieces.
Test the fabric before you commit
A tiny fabric test can save an entire garment. Many training fabrics include spandex, nylon, polyester, mesh, metallic coatings, waterproof finishes, or compression panels. These materials can react in different ways to heat and adhesive.
Before you start, test on a hidden seam allowance, an inside hem, or a scrap of the same fabric if you have one.
Check for these problems:
Heat marks, shine, melting, or puckering
Glue bleeding through thin fabric
Loss of stretch after adhesive dries
Stones lifting after the fabric is flexed
Color change around the attachment area
Rough backs that irritate skin
For stretch gear, pull the fabric gently after the test stone cures. If the stone pops off, the method is not right for that area. If the glue forms a hard patch that cracks or feels stiff, use fewer stones or switch to sew-on accents.
The safest rhinestone design is not the one with the most sparkle. It is the one that moves with the garment.
Avoid placing stones where the body or equipment creates constant pressure. Underarms, inner thighs, waistbands, wrist cuffs, glove palms, boot contact points, and shoulder strap areas take a beating. Even a well-attached stone can become irritating there.
Use hotfix when heat is safe and speed matters
Hotfix is clean, fast, and tidy when used on the right fabric. It works best on stable knitwear, cotton blends, some polyester garments, and smooth practice pieces that tolerate heat.
A hotfix applicator gives more control than a household iron for small designs. It lets you heat one crystal at a time without pressing a large hot surface onto the garment. A heat press can work for larger transfers, but only if the fabric, stone type, and adhesive backing are compatible.
How to apply hotfix crystals cleanly
Start with a clean, dry garment. Oils, fabric softener, sweat, and lint can weaken the bond. Lay the piece flat without stretching it.
Use this process:
Mark the design lightly
Use washable chalk, tailor’s pencil, or small removable dots. Avoid permanent ink unless it will be fully covered.
Place stones before heating
Arrange a small section first. This helps you judge spacing and balance before anything becomes permanent.
Heat one stone at a time
Hold the applicator steady long enough for the backing to activate. Do not slide it around, since that can smear adhesive.
Let the stone cool
A hot crystal may shift if touched too soon. Cooling helps the glue set.
Flex-test the area
After the bond has cooled, bend the fabric gently. Any early lifting means you need more heat, more pressure, or a different method.
Hotfix is not ideal for very stretchy areas. When fabric stretches, the hard glue dot does not stretch with it. You can reduce stress by using smaller stones and spacing them apart instead of creating a dense patch.

Use E6000 when heat is risky or surfaces vary
E6000 is a good choice for many training items because it does not require heat. It can attach flatback rhinestones and rhinestuds to fabrics, faux leather, canvas, some plastics, and accessory surfaces. Always read and follow the label, especially for ventilation, drying time, and surface warnings.
Use E6000 in a well-ventilated area. Keep it away from skin, eyes, kids, pets, and food surfaces. Wear gloves if needed, and recap the tube between sections so the glue stays usable.
The biggest mistake with E6000 is using too much. A giant blob does not make the stone more secure. It creates a messy halo, stiffens the fabric, and can seep through lightweight materials.
How much glue is enough
For small flatbacks, use a tiny dot slightly smaller than the stone. When the crystal presses down, the glue should spread close to the edge without oozing out.
For rhinestuds, check the back first. Some have a flatter surface, while others have texture or prongs meant for different attachment styles. If the back is uneven, glue alone may not hold well on flexible clothing. Use them on low-stretch areas or accessories whenever possible.
A wax picker, jewel setter, or fine-tip tweezers helps keep placement clean. For glue dots, a toothpick, precision tip, or syringe-style applicator can give better control than squeezing straight from the tube.
Give the adhesive time to cure
Dry to the touch does not mean ready for practice. Glued stones need time to cure before the garment gets stretched, washed, packed, or worn. Follow the adhesive label. Many rhinestone projects are left flat for at least a full day, and longer cure times are often safer for heavier designs.
Lay the garment flat while curing. If a sleeve or pant leg folds over, stones can shift or glue can transfer to the wrong spot.
Use sew-on crystals when strength matters most
Sew-on crystals take more time, but they are the most reliable choice for high-stress areas and larger accents. They work especially well on mesh inserts, neckline details, cuffs, collars, belts, skating gloves, dance costumes used as practice wear, and statement pieces that need to survive movement.
Use strong polyester thread or beading thread rather than weak all-purpose thread. Choose a needle that fits through the crystal holes without forcing them. If the fabric is thin, add a small backing patch on the inside to prevent tearing.
Stitch with comfort in mind
Every stitch creates texture on the inside of the garment. For training gear, that matters. Knots, thread tails, and rough backing can rub during long sessions.
Keep the inside smooth by doing the following:
Use small, flat knots
Trim thread tails neatly
Cover scratchy areas with soft lining if needed
Avoid heavy crystals directly against pressure points
Check that the garment still stretches and recovers
For extra security, stitch through each sew-on crystal more than once. If the crystal has two holes, anchor both sides. Tie off in small sections instead of carrying one long thread across the whole design. If one thread breaks, you do not want the entire pattern to loosen.

Design patterns that catch arena spotlights
Sparkle is about placement as much as quantity. Arena lights, rink lights, stage lights, and gym lighting tend to reward movement, angles, and contrast. A few well-placed crystals can read brighter than a flat sheet of stones.
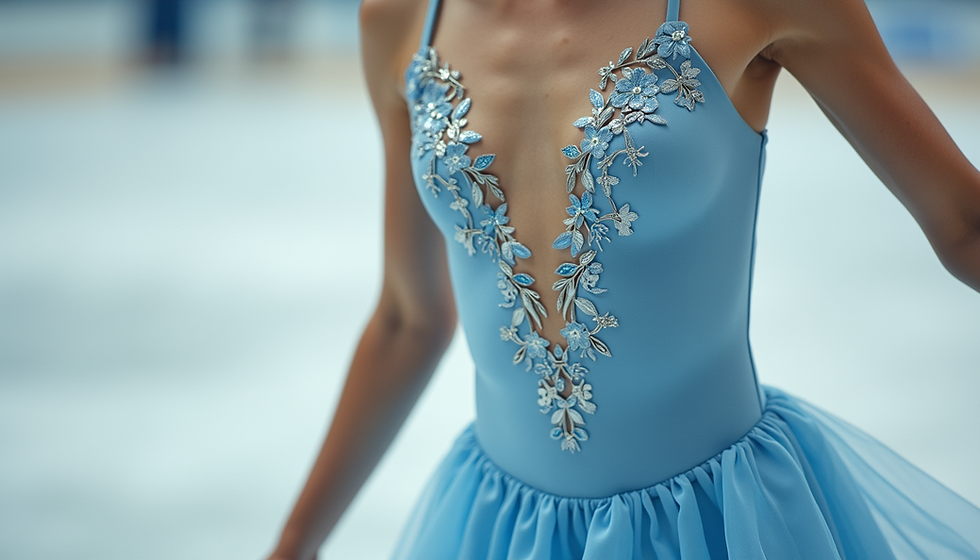
The best patterns follow the body’s movement and the garment’s lines. Curves, diagonals, gradients, and clusters usually look more dynamic than straight rows.
Use lines that move with the wearer
Diagonal lines catch light as the body turns. Curved lines echo spins, jumps, reaches, strides, and arm positions. If the training gear has seams or color-blocking, use those lines as a guide.
Good placements include:
A tapering line along one sleeve
A crystal spray from shoulder to chest
A curved trail around a neckline
A small burst near a hip or hem
Scattered stones across the upper back
A light outline along a jacket yoke
Avoid making both sides identical unless the design calls for a uniform look. Slight asymmetry often feels more alive under lights.
Build a gradient instead of a solid block
A gradient gives sparkle without adding too much weight. Start with larger stones at the focal point, then fade into smaller stones and wider spacing.
For example, on a black training jacket, place medium crystals near the shoulder seam, then scatter smaller stones down the sleeve. On a practice skirt or tunic hem, cluster stones at one side and let them fade around the curve.
The empty space matters. Lights need room to hit individual facets. If stones sit too close together, the design can look like a patch instead of sparkle.
Mix finishes with restraint
Clear crystal gives sharp flashes. Aurora finishes throw more color. Rhinestuds create a metallic look and can feel sportier than faceted crystals. Mixing them can work well, but keep the palette tight.
A clean formula is:
One main crystal color
One accent finish
One metal tone if using rhinestuds
For training gear, restraint helps. Heavy embellishment can change how fabric hangs and feels. Save dense crystal work for performance pieces, and keep practice wear flexible.
Keep safety first during wear and care
Secure rhinestoning does not end when the last stone is placed. Practice gear needs regular checks because movement, sweat, washing, and storage all affect the embellishments.
Before wearing, run your hand gently over the design. Look for sharp edges, lifted stones, loose threads, and glue ridges. Check the inside of the garment too. If anything scratches your hand, it may scratch skin during practice.
After each session, inspect high-friction areas. Fix loose stones right away instead of waiting for more to fall off.
Wash embellished training gear gently
Hand washing is usually safest for rhinestoned items. Use cool water and mild detergent. Turn the garment inside out if the design allows it, and avoid rough scrubbing over the stones.
If machine washing is allowed by the garment label, use a mesh laundry bag and a gentle cycle. Skip fabric softener, high heat, and the dryer. Heat can weaken glue and damage stretch fibers.
Lay the item flat to dry. Hanging a wet, embellished garment can stretch it, especially if stones add weight.

Keep a small repair kit ready
A simple repair kit prevents small problems from ruining a practice day. Store it with the gear or in a competition bag.
A useful kit includes:
Matching spare rhinestones
A few sew-on crystals
Rhinestuds if used in the design
Small tube of adhesive in a sealed bag
Needle and matching thread
Tweezers or a wax picker
Toothpicks for glue placement
Alcohol wipes for non-delicate surfaces
Small scissors
A scrap of soft fabric for backing repairs
Do not glue a loose stone onto sweaty or dusty fabric and expect it to last. Clean the area first, let it dry, then repair. If the garment must be worn immediately, treat the fix as temporary and redo it properly later.
A secure sparkle plan works better than more stones
Beautiful training gear should still feel like training gear. It needs to stretch, breathe, wash, pack, and move. Hotfix is fast and clean on heat-safe fabrics. E6000 is useful when heat is a risk and surfaces vary. Sew-on crystals offer the best security for large stones, stress points, and delicate panels.
Start with a small test. Choose the attachment method by fabric and placement. Keep dense stones away from hard-working areas. Use curves, gradients, and angled clusters to catch spotlights without weighing the garment down.
The goal is simple: gear that sparkles when it moves and stays safe while it works.

Comments